Three Virginia Historic Destinations

  • Visiting Historic Williamsburg, Virginia
  • Jamestown, Virginia – Where America Was Born
  • The Yorktown Battlefield

Along the Southern Chesapeake Bay in Virginia are three of the most important sights in the history of the settlement and founding of the United States Of America. They include the sight of the first English settlement in the country, the town that was the first legislative government and the battlefield where America won its independence.


Colonial Williamsburg, Virginia

Colonial Williamsburg is a living-history museum in the city of Williamsburg, Virginia. The area is an interesting blend of American history and popular tourist attraction. The colonial town is the anchor of a historic triangle in Tidewater Virginia that includes a restoration of the Jamestown colony (the first successful English settlement in North America) and the Yorktown Battlefield National Park and Museum celebrating the victory that brought an end of the Revolutionary War.

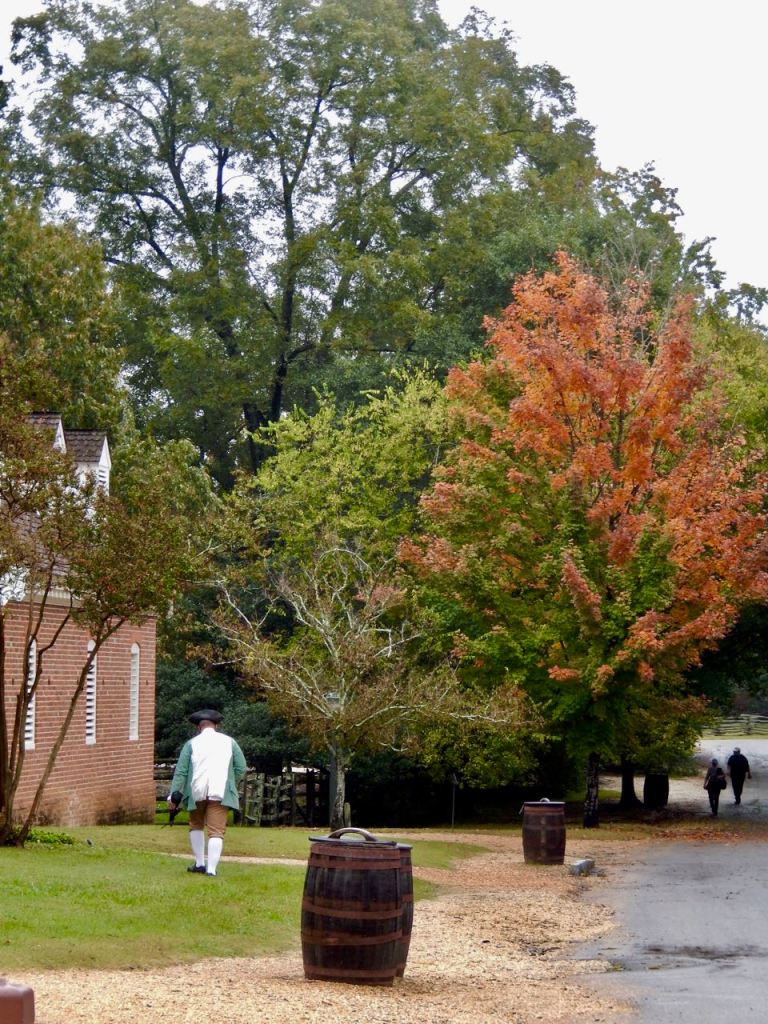
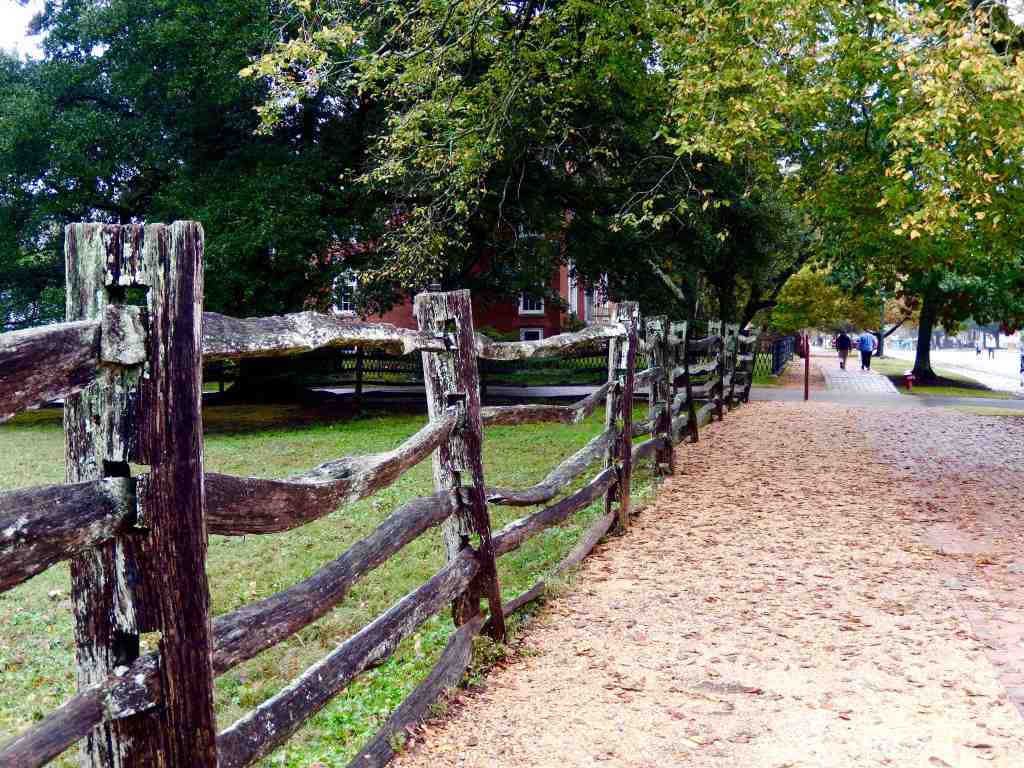
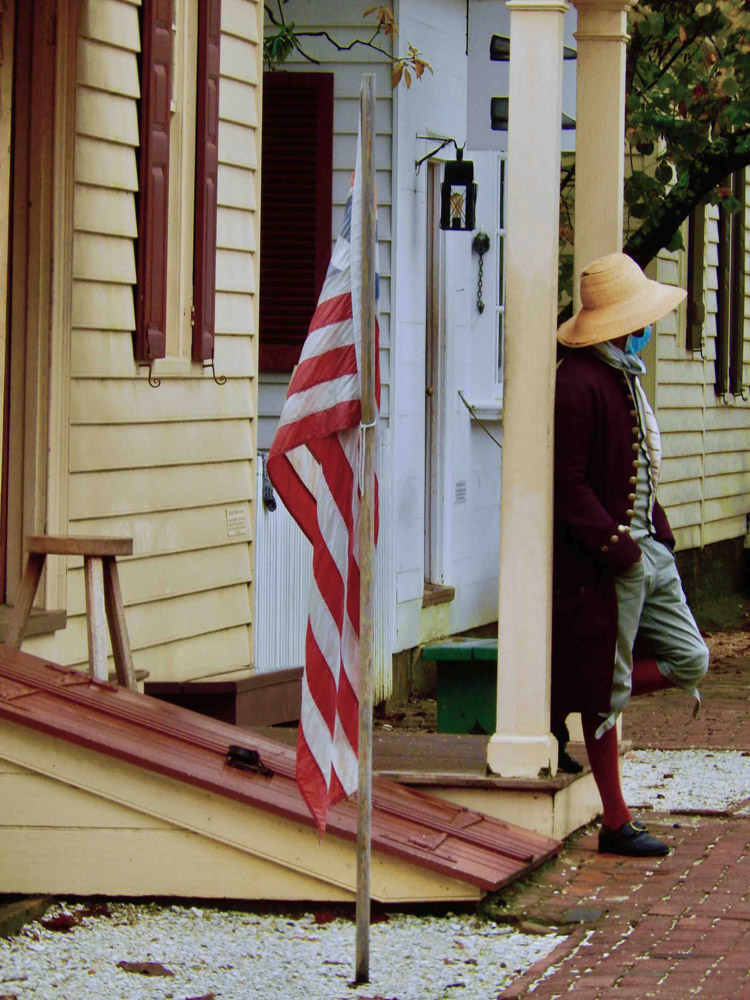
Within just moments walking through town you get a sense that you have been transported back in time some 300 years. If there weren’t groups of tourists that at times disturb the illusion, the feeling would be overwhelming.

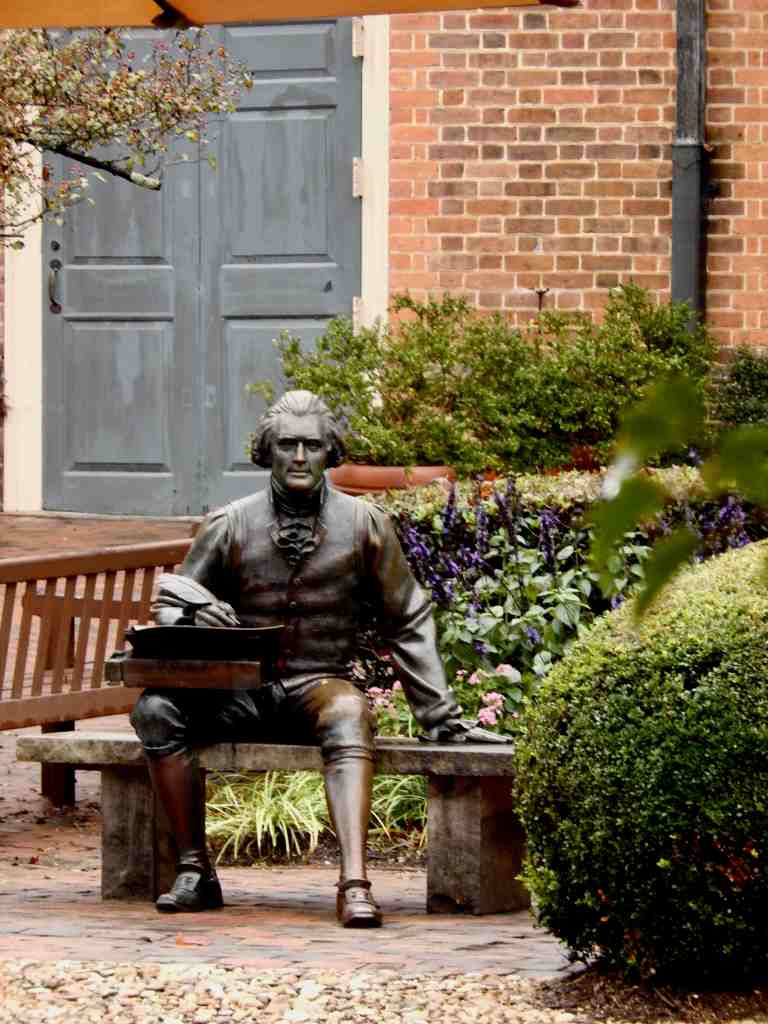
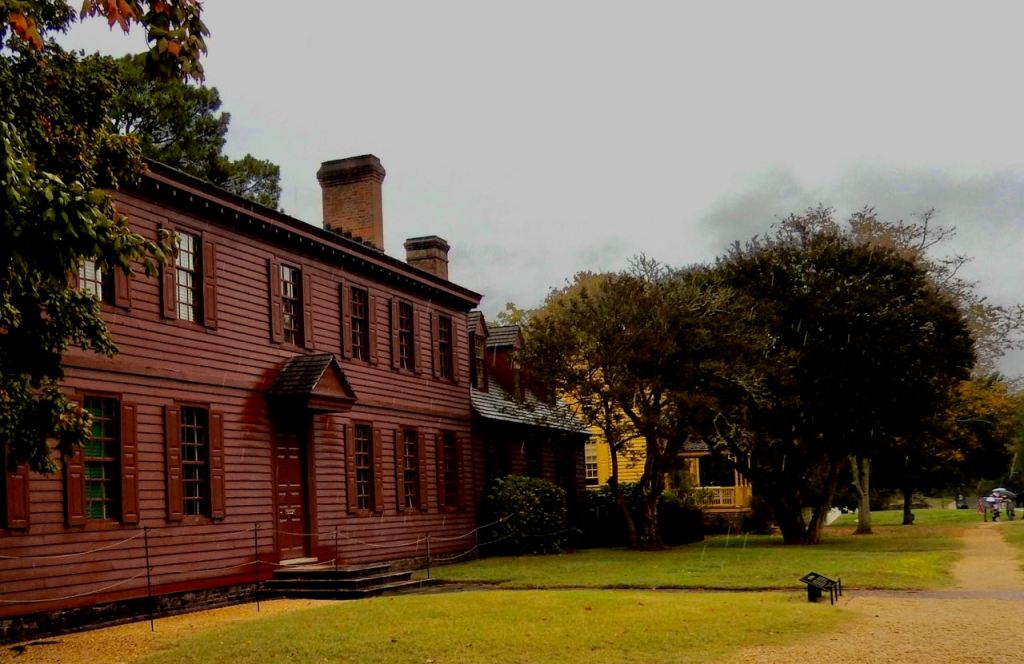
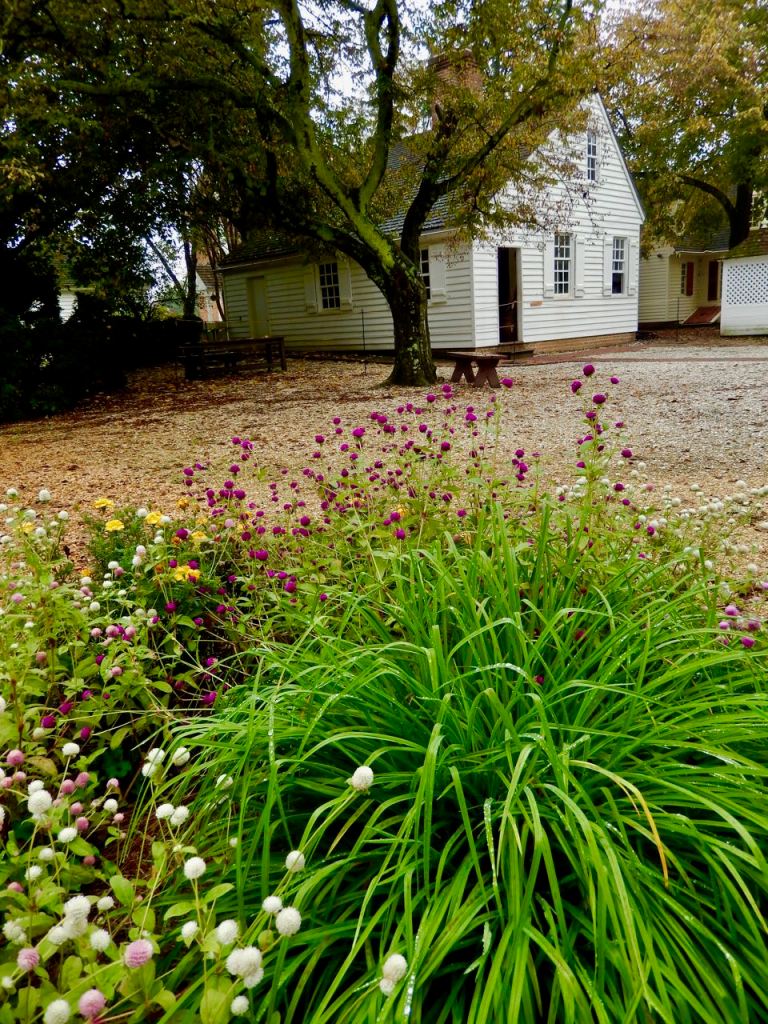
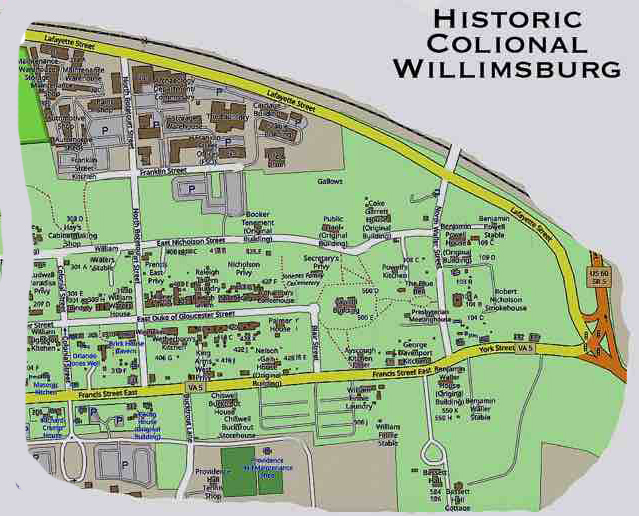
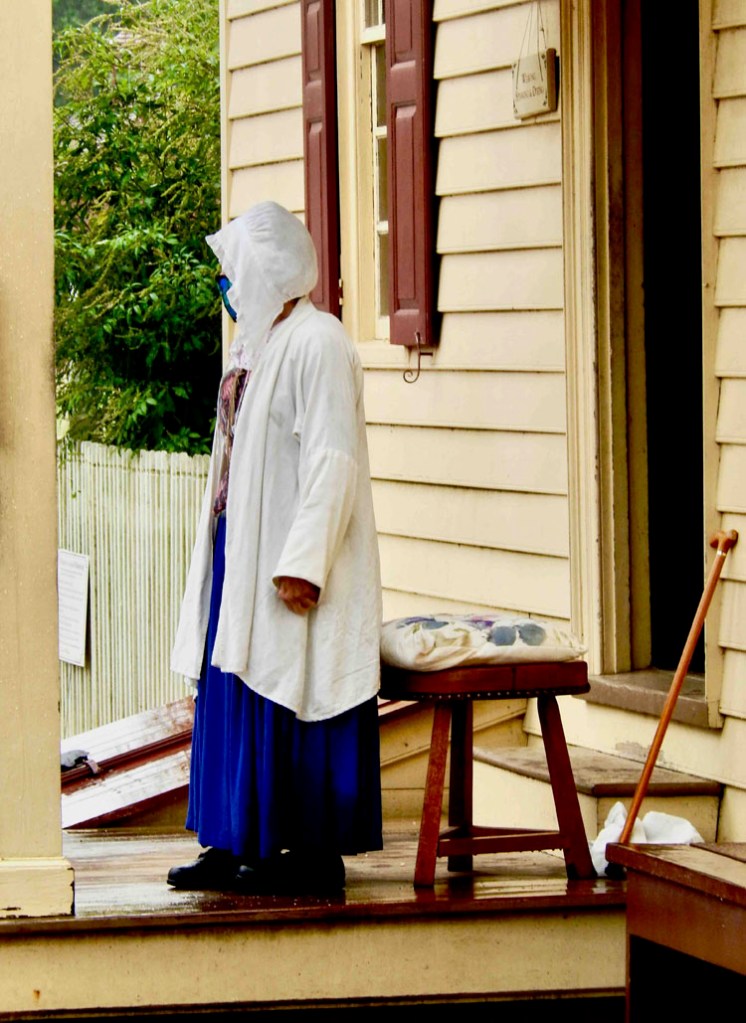
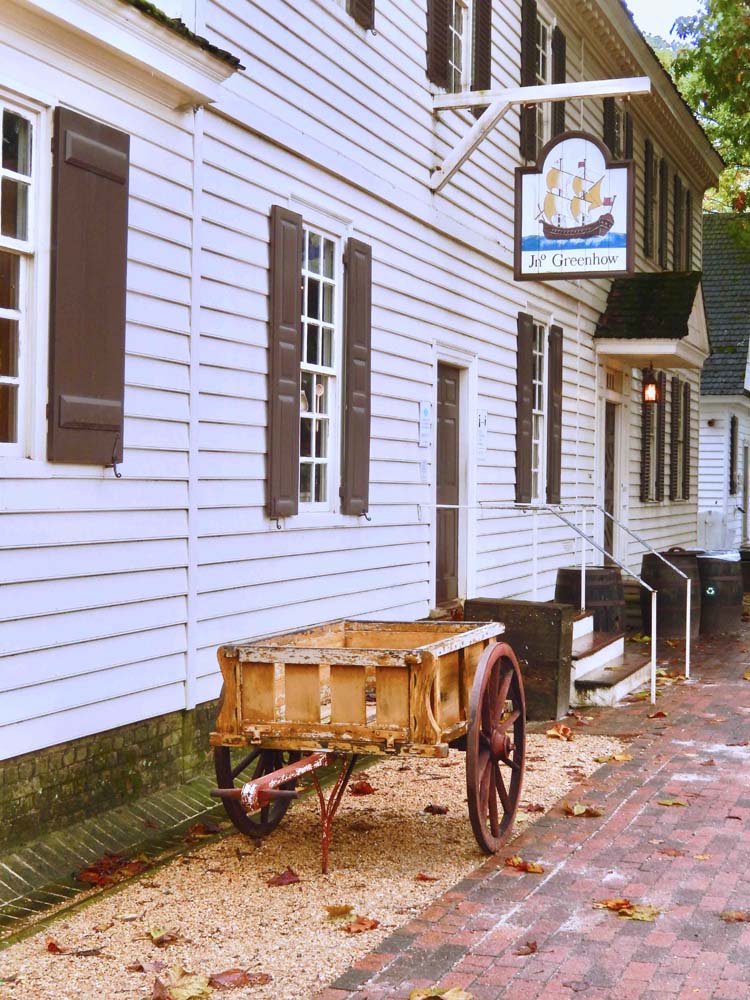
The historic town of Williamsburg is a 300 acre area that encompasses several hundred restored or re-created buildings from the 18th century, when it was the capital of Colonial Virginia. A living interpretation of a colonial period American city, the historic district includes three primary streets and their connecting side streets that represent the accurate character of 18th-century America. While it is faithful to the period with costumed employees who work and dress as people did back at that time, it is also a current residential neighborhood with private residences mixed into the historic buildings.

Conceived in the 1920s, the restoration and re-creation of colonial Williamsburg was championed as a way to celebrate our countries revolutionary patriots and the history of the early United States. The project got its start with seed money in a grant from John D. Rockefeller Jr., and his wife, Abby Aldrich Rockefeller.

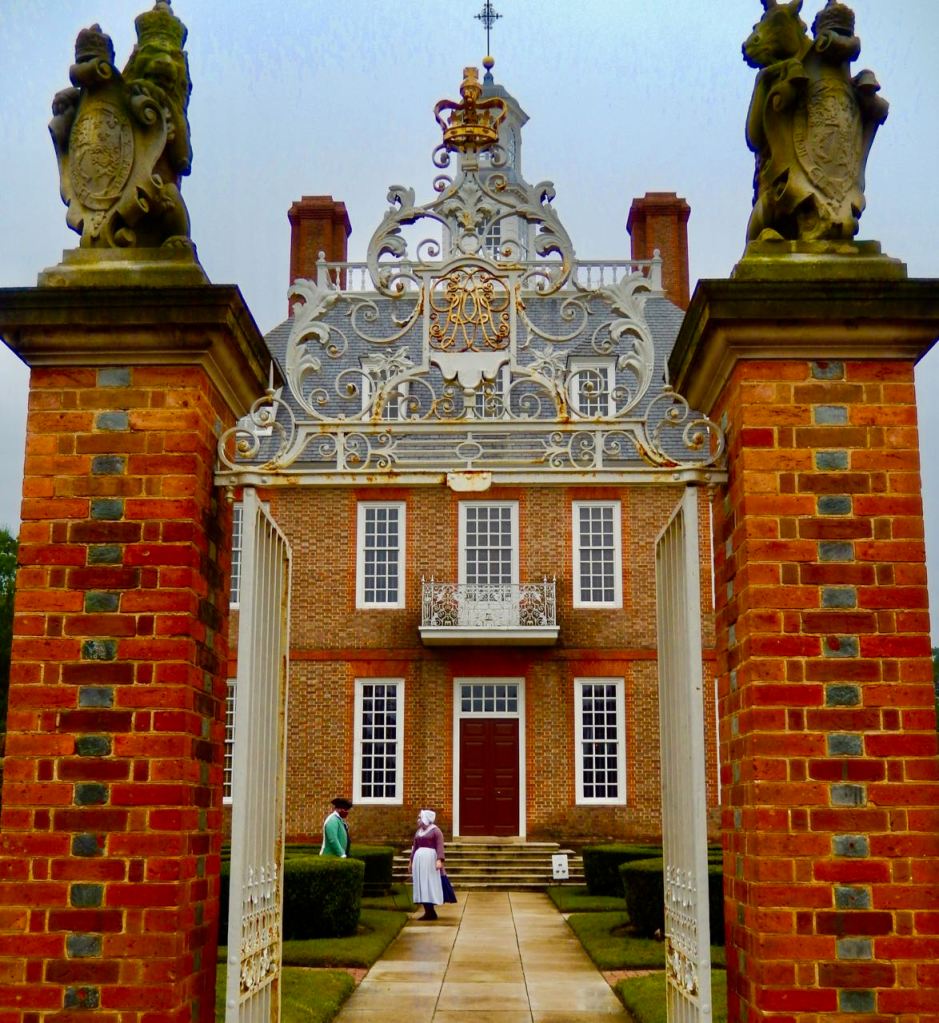
Major buildings include Raleigh Tavern, the Capitol building, the Governor’s Palace (all reconstructed), as well as the Courthouse, the George Wythe House, the Peyton Randolph House, the Magazine, and the functioning Bruton Parish Church (all originals). Four taverns have also been reconstructed for use as restaurants. There are historically accurate craftsmen’s workshops for trades, that include a printing shop, a shoemaker, blacksmith, a cooperage, a cabinetmaker, a gunsmith, a wigmaker, and a silversmith.

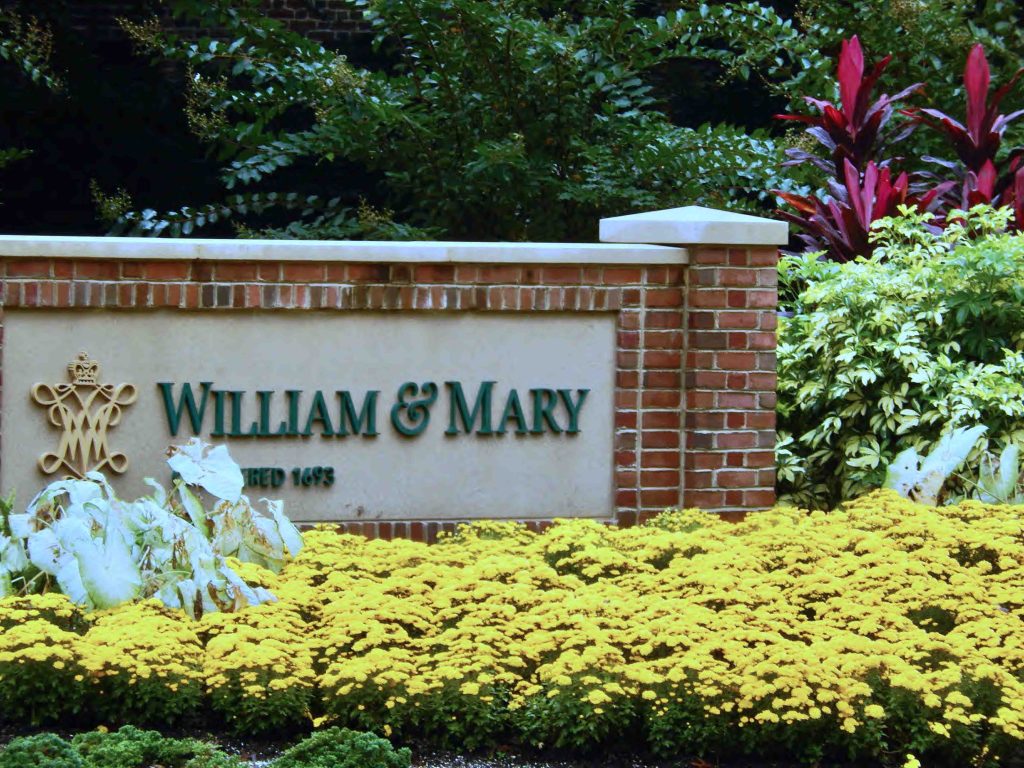
Colonial Williamsburg is also intertwined with America’s second oldest college, William & Mary, which has its campus attached to the west side of the historic district. A newer commercial area that includes a number of upscale shops and a campus book store and coffee shop that connects the two properties.


Jamestown Colony, Virginia

Susan Constant, Godspeed, and Discovery

The United States of America owes much of what it is today to a strip of land between the James and York Rivers as they flow into the Chesapeake Bay in Virginia. This strip of land is where the first successful English colony was established in America, was one of the locations where the political foundations of the American Revolution were laid and where the final battle for independence was fought and won.

In 1607 three English ships, the Susan Constant, Godspeed, and Discovery, sailed into the Chesapeake Bay and 104 settlers set out to establish an English settlement in North America. They named it Jamestown. Many of those first settlers died of disease and from Indian attacks but new arriving ships brought more settlers and by 1610 the colony was firmly established. An extended peace was established after the marriage of colonist John Rolfe to Pocahontas, the daughter of Powhatan the regional native chief. During the 1620s, Jamestown expanded from the area near the original fort into a small town. It remained the capital of the Virginia colony until 1699 when the capital was moved eight miles northwest to the larger settlement town of Williamsburg.

Powhatan Indian makes canoes
Continental army encampment

Thus began the successful English colonization of North America. Within less than another one hundred years, on that same strip of land General George Washington of the Continental Army would defeat the English army under the command of Lieutenant General Charles Cornwallis. That victory established the security of America as a new nation.

Visiting this area of Virginia is as near as you can get to traveling back in time to explore the beginnings of our nation.

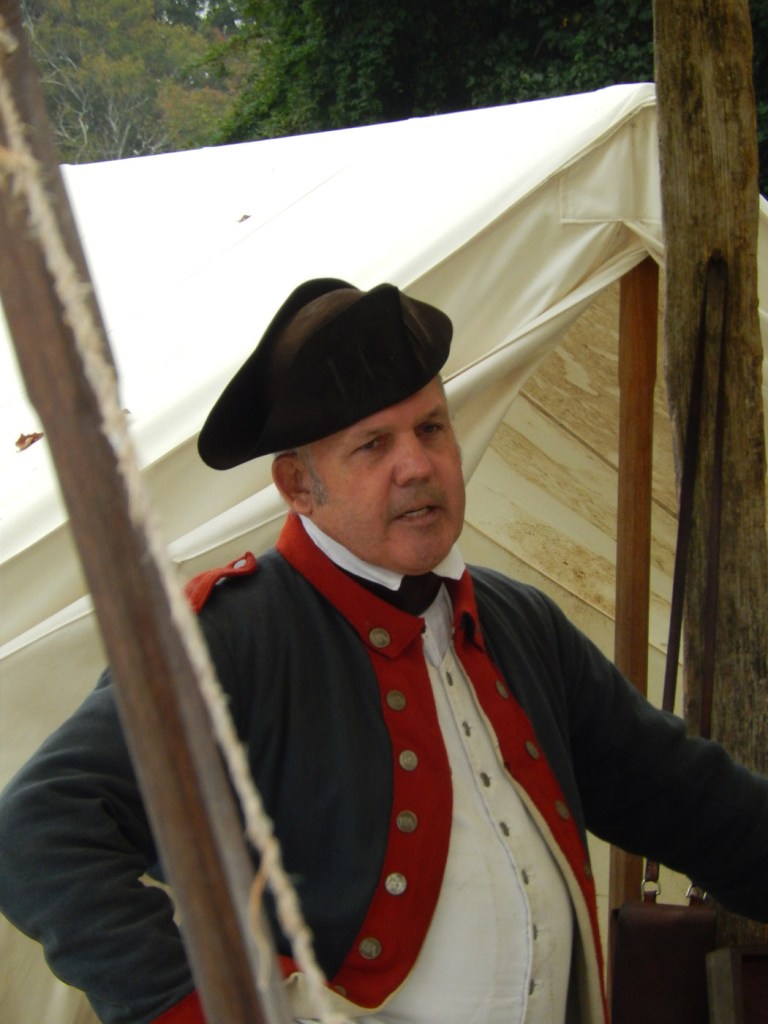
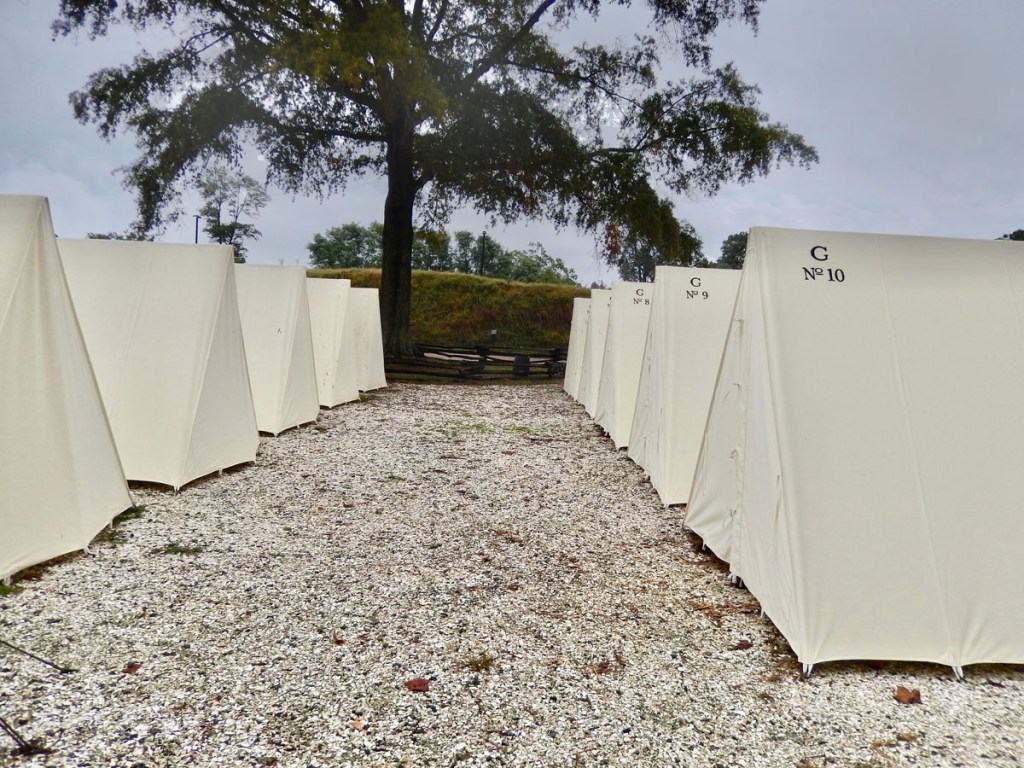
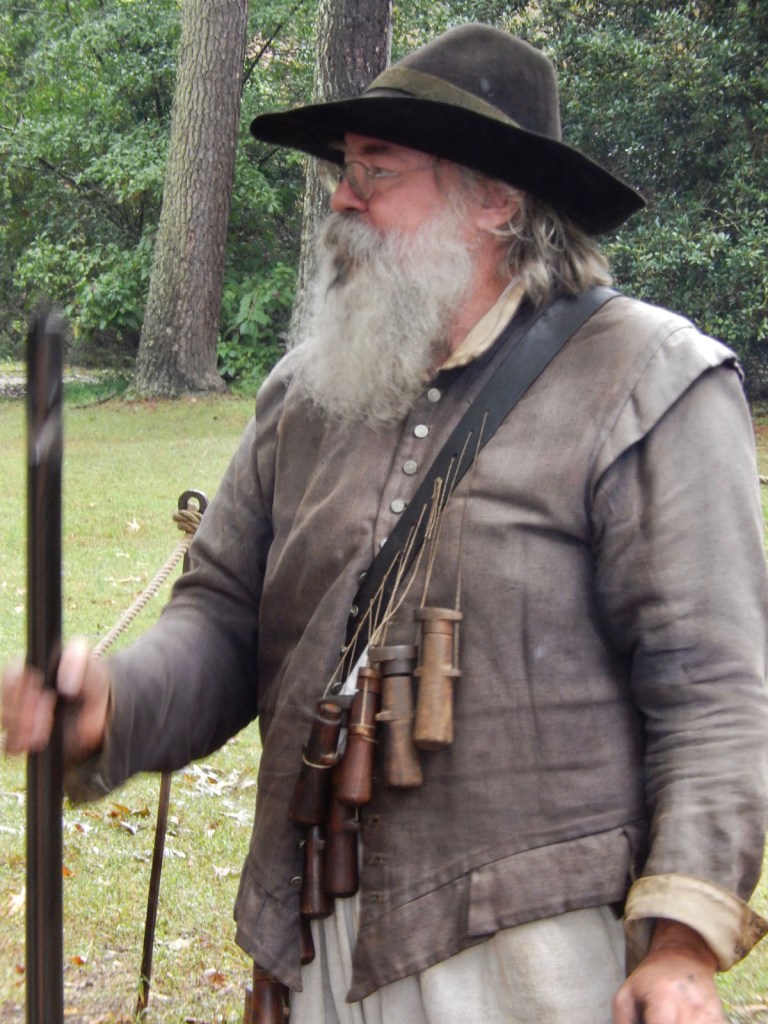
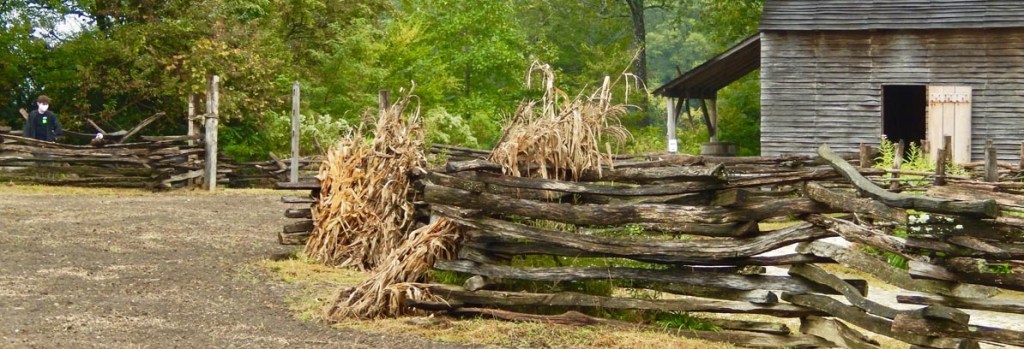
The Yorktown area features the Yorktown Battlefield National Park along with a truly impressive American Revolution Museum. On the property of the museum stands a reconstruction of a 1780’s period farm as it would have looked at the time of the battle along with a Continental Army encampment featuring live demonstrations.

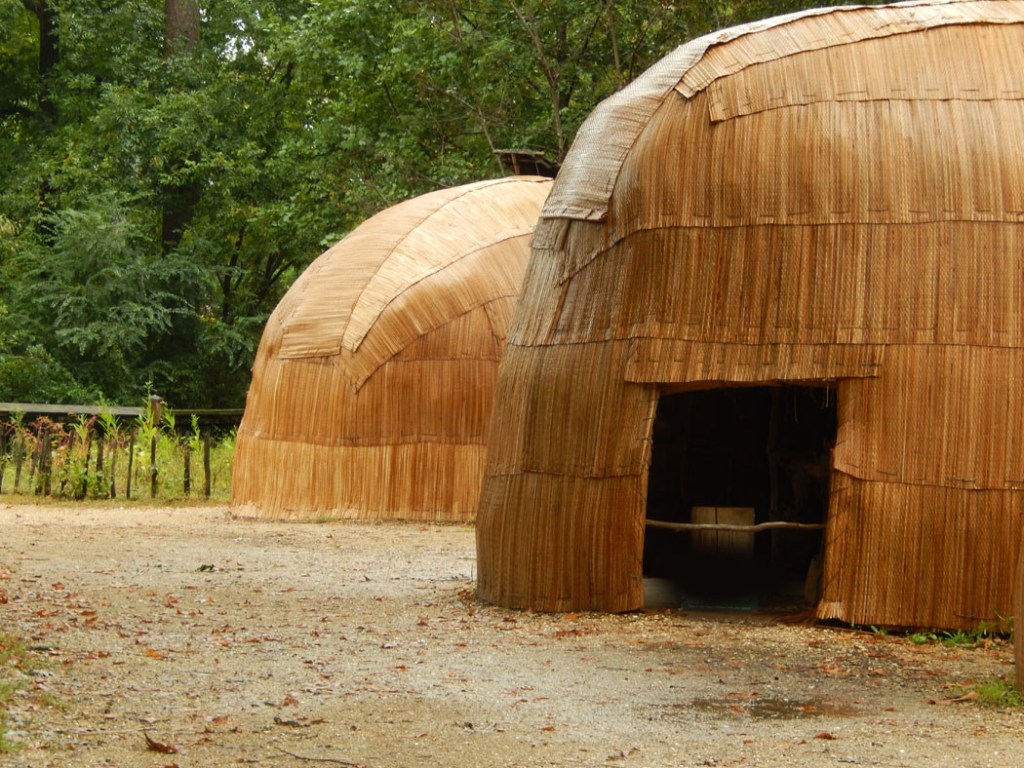
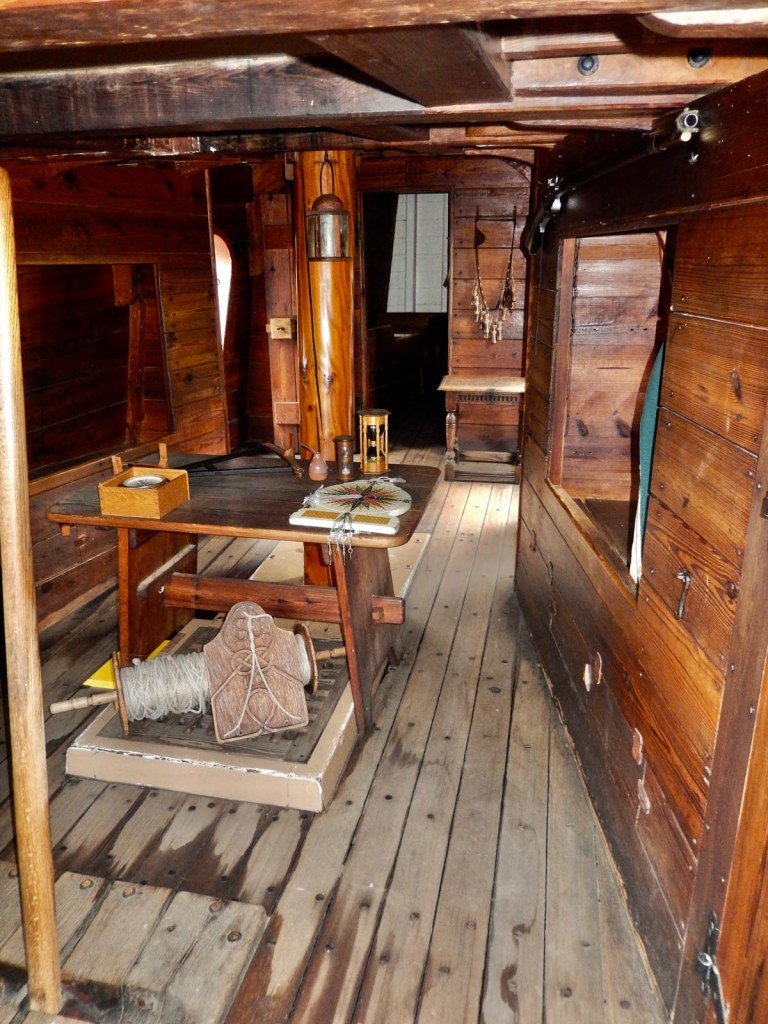
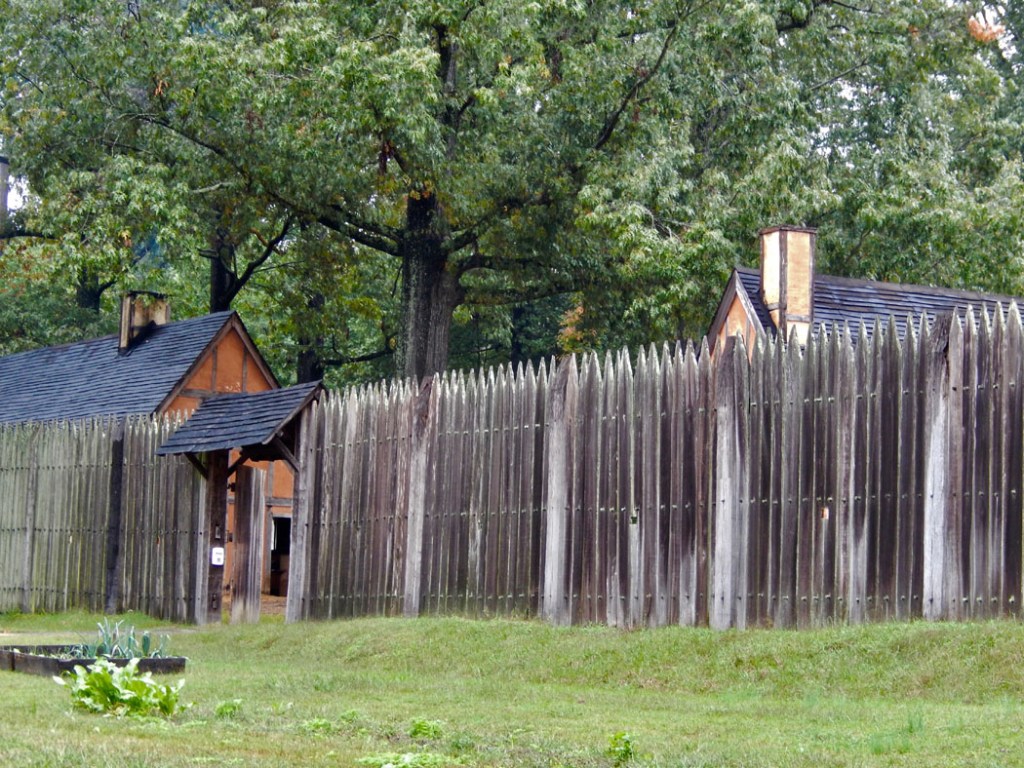
Not far from Yorktown is the Jamestown Settlement historic site. It features a demonstration Powhatan tribal village developed from actual drawings of the historic period. An informative museum dedicated to the history surrounding the Jamestown settlement and the people that made it possible, along with a replica of the original Fort James. Tied up on the river next to the fort are reproductions of the boats Susan Constant, Godspeed, and Discovery that carried the first settlers to this new world. Also nearby is the archaeological site owned and managed through a private/public partnership between Preservation Virginia and the National Park Service to excavate and explore the actual site of the original fortified town.

If you really want to see where this nation was born come and visit Tidewater Virginia.

Williamsburg

The Yorktown Battlefield National Park

The Yorktown Battlefield Park is a National Park where the last major battle of the American Revolutionary War took place. The Battle of Yorktown was a crucial battle fought during the American Revolutionary War. It marked the final major battle of the war and ultimately led to the surrender of British forces. The battle lasted for approximately three weeks, from September 28th to October 19th, 1781. The Yorktown Battlefield Park in Virginia marks the location of this historic battle and is an important site for understanding the significance of the American Revolution.

In the Yorktown Battlefield Park is the Surrender Field that marks the spot where British General Charles Cornwallis surrendered his army to General George Washington on October 19, 1781, effectively ending the Revolutionary War. In the field surrender monument and a recreated version of the field as it would have looked during the battle.

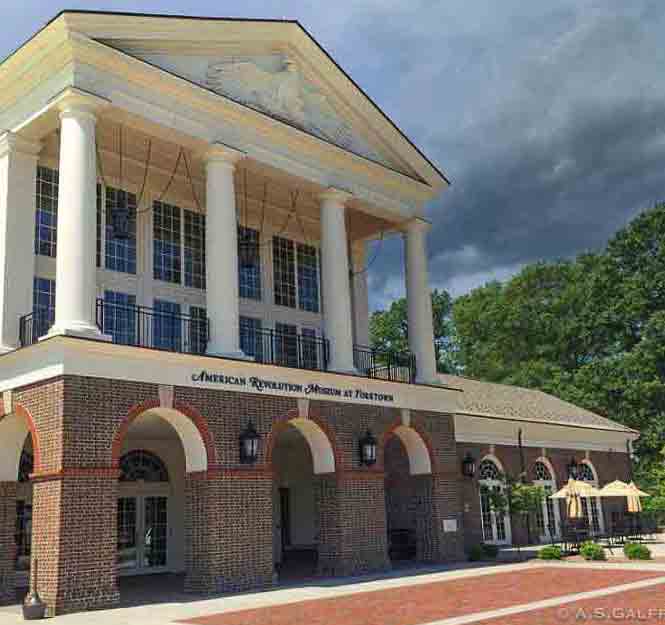
Also located near the park is The Revolutionary War Museum featuring exhibits and artifacts from the American Revolutionary War. Visitors can explore the galleries and learn about the war’s causes, major battles, and key figures. Some of the museum’s highlights include George Washington’s field tent, a reproduction of a Continental Army soldier’s campsite, and a multimedia theater experience.

Casual Fashions For Ship N’ Shore

We’ve been traveling the world most of our lives and posting as The Intentional Travelers for over five years and we have also done a good deal of cruising. Since 1999 we have taken over sixty five cruises stopping in more than one hundred ports. Five years ago in conjunction with The Crafts Mart we’ve been designing and producing graphic tees.

Under the name Cruise Life we’ve offered a number of shirts that are great for both ship n shore – designs that are easy to dress up but are also casual enough for beach or pool deck. Featured here are two of our most popular T-shirts dedicated the cruise life…

Cruise Life – This Is My Happy Place T-. A premium cotton tee shirt available in a full range of sizes and a number of colors. Each order is custom produced. For options and to select a shirt click below.

Please Note: Currently because of the complexity of international shipping we can only sell in North America We also regularly provide two options for ordering:

Etsy – For those concerned about the safety of their transactions Etsy, one of the worlds largest shopping sites offering one of the best shopping guarantees on the internet.

Direct – Get faster delivery and a better price place your order directly with our production facility.

Cruise Life A Day At Sea T-shirt. A premium cotton tee available in a full range of sizes and a number of colors. Each order is custom produced. To see options and to select a shirt click below.

Photography And Camera Controls

Exercising More Technical Control To Improve Your Photographs

controlled depth of field using shutter speed
Carnival at St. Peters [depth of field]

When we approach a scene of interest to take a picture we look for what composition can be included in the frame and maybe what the lighting is doing to the scene. In most instances the camera is automatic and handles all the technical details for you. Those actions can best be described as recognizing an interesting scene and photographing it, but there is more to photography than just that. While the camera (be it film based, DSLR or a cellphone) is designed to quickly do that job, often automatically, it usually has a lot of additional capabilities. It has a number of tools that the photographer can employ to further interpret the scene.

While there are a number of cameras that are automated to just point and shoot, most better cameras (cellphones too) have additional controls; the shutter speed which specifically determines how sharp the image is when there is motion involved (either in the scene itself or with the hand holding the camera) and the aperture which is the lenses area that controls how much light gets in through the lens during the shutters opening.

slow shutter speed and tracking a moving object
Tracking a moving object

Shutter Speed is the measurement of how long a shutter is open in taking a photograph. To minimize problems involving motion that can create blur in the image you can set faster shutter speeds that can reach 1/1000th of a second or even faster. In very low light, shutters can stay open 1 second or even longer to get enough light to resolve the image. In cameras there are a series of shutter speeds with each step a doubling of the speed from the previous step. Typically they are 1 second, ½ second ¼, 1/8, 1/16, 1/30, 1/60, 1/125, 1/250, 1/500th of a second.

While it may not seem that it would produce a usable photo, there’s a technique using a slower shutter speed and tracking a fast moving object like a race car. Tracking the object for a couple of seconds, keeping it centered in the frame click the exposure. Often the object will be sharp against a blurred background.

f/Stops with half stops
macro and depth of field
Narrow depth of field

Aperture size or f-stop technically is a ratio of the focal length of the lens to the iris diameter that is controlling the amount of light and is expressed as a fraction. Think of the letter f as the numerator over the denominator’s number where the higher the denominator number the smaller the fraction. It looks like this f/ 1.4 where f/1.4 lets in twice as much light as f/2.8. The most common whole progression being f /1.4 , f /2.8, f /5.6, f /11, f/ 22 with some cameras also having half stops like f/16. Besides controlling the amount of light getting through the lens the f-stop also controls depth of field or how much of the depth through a scene is in good focus.

depth of field to add interest
Passau Germany and selective focus
depth of field to add interest

Exposure or equivalents are called reciprocity. It’s the concept that combinations of shutter speed and f stops allow exactly the same amount of light into the camera when taking a picture. f/5.6 at 1/125th of a second is the same amount of light as f/11 at 1/60th of a second. The slower shutter speeds allow the photographer to set smaller apertures that create a greater depth of field. The selection is always a compromise between motion blur and reduced depth in focus.

Playing around with shutter speeds and different f stops is the best way to appreciating what you can accomplish. Sometimes an image has more impact with deliberate motion blur. Like tracking a fast moving object with the camera while clicking the shutter at the same time will often provide great pictures where the moving object is sharper while the background shows motion blur. Setting faster shutter speeds also provides for smaller depth of field and that is a great way of focusing attention on a specific area in the scene.

Viewfinder of metered SLR camera

To make use of these features in a digital camera or your cellphone requires that you understand how controlling shutter speed and aperture works in your device. Check the manual or do a device specific internet search and start playing with those controls.

Upping your cell phone game

Controlling focus and exposure separately. The problem with accomplishing that trick is that the iPhone sets both exposure and focus with a single tap. If you tap on your foreground subject and it’s dark, you can end up over-exposing the photo. The easiest way to solve that problem, is to install a better camera app and there are a number available – these include Camera+ ($2) and Top Camera ($3). By using either of these apps, you can tap separately to focus and specify where to set the exposure. The end result: You no longer have to live with under- or over-exposed photos just because you chose to set a specific focus point.

There are also other apps that allow you to change an image after it’s taken. There’s FocusTwist that shoots a short video and then shows you a still photo derived from the length of video. There’s also AfterFocus ($1). Open a photo or take one, and then outline the areas that you want to be in sharp focus. The app then blurs everything else for you, giving you a convincing shot with simulated depth of field.

Lock the focus without using an app on you iPhone. Instead of a tap to set only exposure you can lock the focus on the iPhone with a tap and hold on any spot on the screen for a few seconds and when you see a yellow box flash around your finger tip, remove your finger and you’ll see the message “AE/AF Lock” on the screen. Until you take the photo, the focus and exposure will remain fixed at when you released your finger until you tap the shutter release to take the photo.

Apps for Android users.

Open Camera is a compact camera app for Android cellphones and tablets. It is free with no in-app ads. This Android app has different focus modes, scene modes, auto-stabilizer, HD video recording, handy remote controls, configurable volume keys, geotagging of photos and videos, support for an external microphone, HDR, dynamic range optimization mode, small file size, etc. and it’s open-source.

Google Camera comes installed on all Pixel devices but the Android community, has managed to make Google Camera app available on other Android devices. Making things like Pixel portrait mode, HDR+, and more plus the Pixel 4 camera’s Astrophotography feature, which enables users to capture great shots in the dark. GCAM apps are ported by third-party developers, so you may find lags and bugs in the download.

Adobe Photoshop Camera is good for taking a lot of selfies as the app comes with a ton of camera filters and effects. The filters can be applied before or after you shoot the picture, and some are remarkable and the app has intelligent AI that recognizes the subject in the picture and applies filters with real precision. It also has post-editing tools that change brightness, contrast, saturation and a magic wand tool that can remove sharp shadows and deep black areas. Unfortunately it does not allow for manual selection of shutter speed, exposure, focus, and is supported only on a few Android devices.

In closing, I had a number of people that challenged me with projects designed to train my eye to see and take better photographs. In the next section I will offer some of those examples to help improve your picture taking.

Composition In Photography

Composition Rules For Improving Your Photography

Ansel Adam’s Mount Williamson from Manzanar – Shooting from a low perspective

I’ve spent most of my life in photography and long ago I learned a few things about composition. What turns an okay picture into something really good. When to follow the rules and when to break them but most of all how important it is to be aware of just what you’re seeing

Cherry blossoms at the Jefferson Memorial – Framing with a foreground element

My education also included a lot of time studying the masters of the craft and I had the privilege to meet and talk to a number of them and it has influenced my approach to taking photographs ever since. Here I like to offer some ideas on what to look for to help make your photography more compelling.

Foreground and the S curve

Don’t Just Stand There – Very few great photographs were actually taken from five feet above the ground. That’s the height of a camera held in front of your face while standing. It may be the most comfortable position for taking pictures but it is also the most often used, the most ordinary. I had a Nat Geo photographer once tell me that if he isn’t in the dirt or hasn’t climbed something to get the shot he just isn’t doing the job he was hired to do. Simply put, changing your point of view and your perspective changes the picture for the better. Consider the Adam’s image Mount Williamson from Manzanar above.

Dunedin, Florida sunset – get up early – go out late

The Time Of Day Matters – It’s hard to take a Sunrise if you don’t get out of bed and Sunrises usually provide the day’s best lighting.The golden hours. Get out there when the world is just waking up and you’ll often see some remarkable sights. The same holds true around sunset. Late evening and nighttime scenes have their own special magic. Photography is a function of light and contrasts and it’s all about the light.

Look For The Geometry In A Scene -Composition can speak directly to the subconscious causing the eye and mind to be drawn into the flow and depths of the image. Have you ever seen two images of pretty much the same scene where one is just flat while the other draws your attention? It is elements of composition that make the difference. Consider a few simple tricks.

Ansel Adams – The Tetons and Snake River

The S Curve – Famous landscapes are often examples of the S Curve but it can be incorporated in a number of images. A photograph that has a flow to it usually has graphic elements that wind back and fourth through the frame in an S shape. Start looking at images and you will find the S shape often. It tends to cause the eye to start at the back of the scene and travel through the scene following that S curve. Ansel Adams photograph of the Tetons and Snake River is a perfect S Curve.

Bondi Beach Australia and the S curve
Framing the subject

Frame The Scene – A sense of depth in a photograph actually draws us into the image and makes it more meaningful. Again the appeal is often subconscious but that too adds to the impact of a photograph. The easiest way to add depth and appeal to a scene is to include near objects in a distant shot like tree limbs or near rock formations. Conrad Hall was the cinematographer on Butch Cassidy and the Sundance Kid and Paul Newman and the cast thought that there was so much filming from behind bushes that at one point they tied bushes around their waists to cover part of their faces as a joke.

Ansel Adams – Birch trees

Use The Rule Of Thirds – Either in taking a picture or later cropping it consider the Rule of Thirds. Divide a scene into thirds horizontally and vertically and that produces four line intersections. Place the most important element in your scene at the points where they intersect. These are called power points and the most significant one is the lower right. Most right handed people are drawn to that location first in a scene. The more muted the rest of the composition the more powerful the image.

First and foremost, the take-away for improving your photography is don’t just shoot the scene in front of you but take a moment to appreciate it and the elements that make it interesting along with its surroundings. You are about to create a two dimensional graphic representation of your experience – make it as interesting as you possibly can.

Download our short guide to taking better pictures. Our pdf guide is free to download use and print.

Strategies for Fun and Stress-free Business Travel

A guest post by Vivek Mukherjee

Strategies for Fun and Stress-free Business Travel

Business trips can be an arduous affair, filled with busy schedules and long days of travel. But they don’t have to be so stressful – with a few simple techniques, you can make your business trips more enjoyable. From packing light and taking the time to relax to exploring the local area, here are some great tips for making your business trip less tiring and more enjoyable.

Take Only What You Need

When packing for a business trip, it is important to keep your luggage light. This will make your travels easier and more efficient. Pack only the essentials, and avoid bringing items that will take up too much space or add extra weight. A few well-thought-out items can still make traveling comfortable while keeping the load lighter.

Early Is Better

Arriving early for a business trip is a great way to get settled in and adjusted before the work begins. Setting aside time to explore the city or town you’re visiting also helps you to become familiar with the area and will make you feel more relaxed before any important meetings or presentations. This early preparation can have a positive impact on your overall performance.

Keep Your Fitness Routine

Traveling for business can often mean long days and jet-lagged nights, taking precious time away from your fitness routine. But that doesn’t mean you have to scrap it altogether. With a bit of focus and planning, you can still stay fit while on the go. Make sure to book accommodations with an in-house gym or access to nearby facilities, set aside dedicated time each day for exercise, and try to explore the area with an active activity like running or cycling when you get the chance. 

Use PDFs to Manage Travel Documents

PDFs are a great way to organize your travel documents. They offer an efficient way to store and access important documents, like boarding passes, hotel reservations, flight itineraries, and more. PDFs are easily editable, and shareable and can be made password-protected for added security. Plus, they’re compatible with a wide range of devices so you don’t have to worry about compatibility issues when traveling abroad.

Explore the Area

Business trips provide an excellent opportunity to explore different cultures and gain new experiences. Take some time during your travels to explore the local culture by visiting museums, trying out new foods, attending cultural events, etc., Doing this will not only make your business trip more enjoyable, but it will also give you insight into different perspectives that could benefit your work in the future.

Be Prepared to Network: Carry Business Cards

Carrying business cards with you at all times is essential if you want to maximize networking opportunities during business trips. Business cards are more visible than emails, plus you have something tangible to leave with potential customers or clients. Making your own business cards isn’t difficult. You can try this yourself by using free, pre-made templates you can customize with images, text, colors, and fonts.

Find Ways to Reduce Expenses

Business trips often require you to spend money on things like transportation, meals, lodging, etc. With a careful approach, creating a trip that’s almost free is totally possible. You can deduct the cost of your hotel room and transportation in full for your business-related travels. Plus, half the cost of meals and entertainment can also be written off if properly accounted for. Just be sure to save all your receipts during your trip so you can prove any deductions you take.

Business travel can be stressful, but with these strategies, you can make the most of your trips and come back feeling refreshed, energized, and ready to tackle new challenges. Keep a cool head, plan ahead, and find creative ways to have fun at every destination. With the right attitude and a few smart travel hacks, business trips can become both enjoyable and productive.

For more articles and content to help you find inspiration for your travels, be sure to check out the other posts on The International Traveler.

Utah’s 9 Mile Canyon

A Journey Into America’s Past

In the remote Utah desert, about 125 miles south from Salt Lake City, is Nine Mile Canyon. The area is filled with tens of thousands of petroglyphs and pictographs, some thousands of years old. The earliest were produced by hunter-gatherer cultures of the mid-to-late Archaic periods from almost 7,000 years ago, more were produced by members of the Fremont culture from 500 BC to 1200 AD, and the protohistoric Ute and Shoshone tribes 1200 BC to 1850 AD. The artists who created these rock images were witness to dramatic environmental shifts. Lake Bonneville shrank into todays Great Salt Lake while lush vegetation and plentiful wildlife vanished into desert. The creators of 9 Mile Canyon petroglyphs are numerous indigenous people who lived in these canyons for thousands of years. These petroglyphs are considered a window into America’s distant past.

The area of the canyon is remote with only a few ranches and little signs of habitation. It won’t be unusual to find cattle roaming down the road. To get into the canyon from the south, along a paved, 21 mile road from US 191. From there it’s another 25 miles to the east end of the rock art sites near the Great Hunt Panel. Getting to the canyon from Price go east on Highway 50-6 through Wellington, It is a total of 7.5 miles to the Nine Mile Canyon turn-off at Soldier Creek Road. Next turn left, or north. Oddly, Utah’s 9 Mile Canyon is approximately 46 miles long and located in Carbon and Duchesne counties.

The Bureau of Land Management (BLM) manages the area and allows visitors on their own to explore the canyon’s many petroglyphs and other historical sites during daylight hours only. It’s important to note that visitors should “Leave No Trace” of their visit and respect the cultural and historical significance of the area when hiking. See BLM 9 Mile Canyon site HERE.

There are no consistent markers indicating various petroglyph locations and few turnoffs or designated parking. You’ll need to keep an eye out for small, often hand made signs marking some trail entry points with many partially hidden by brush. The best way to find these sites is by keeping track of car milage as you drive the road.

Driving Instructions To Explore Te\he Canyon

From the state road onto 9 Mile Canyon Road it is 21.1 miles to the bridge over Minnie Maude Creek. Starting at the highway turn off, drive on paved road through sagebrush and juniper country. In the spring you may see deer down from the hills feeding in the alfalfa fields.

At 12.2 miles you’ll pass through the Soldier Creek Mine parking lot. The road climbs slightly to the summit of the hills. The creek running to the west is Minnie Maude Creek.

A half a mile after the bridge is a BLM sign with information about the canyon.

It’s 1.5 miles from the bridge to the old homestead on the left side of the road.

Another 3.3 miles from the homestead are the first major panels of petroglyphs. The first panel is a good opportunity to view some petroglyphs up close. The rock art is on a rocky point to the left of the road. If you stand back from the petroglyph rock and look over your head. You will see an excellent panel of petroglyphs just above a narrow ledge. If you are careful, you can climb up to the ledge for a closer look.

Another 3.2 miles from this first location is the first structure created by the Fremont culture. On your left is a large, sagebrush-covered hill. Locate a flat-topped rock on top of the hill. Several hundred yards below that rock and slightly to the left, there is a rock cliff with several long cracks in it. With your binoculars, examine the base of the largest crack. You will see the remains of a round structure. On the low ridge to your right are pit houses.

Going another 1.0 miles you will come upon the remains of the ghost town of Harper. It was once a stagecoach stop and a sheep ranch.

Near here is a BLM provided parking lot with picnic tables and rest rooms. There are additional restrooms in about 12 miles

After another 1.4 miles the road curves around a balanced rock near the left edge of the road. Stop just around the corner from the balanced rock. To the left of the road is an excellent panel with a variety of figures. You can climb up to the ledge, but be careful of loose, falling rock.

Go another 1.4 miles and look for smooth sections of rock covered with black patina, to the left of the road halfway up the hill. There are carvings all along this section. In particular, note the excellent panel with some unusual figures of human shapes with headdresses and toes and fingers, there are lines of deer, and some designs with squares created from dots. You’ll need binoculars for a better view of the petroglyphs, or you can climb up to these panels.

Another 1.4 miles on the right next to a line of tall cottonwood trees. To your left, look halfway up the hills at a design of a large snake. With binoculars find the rock faces on both sides of the snake. To the right is a rock covered with trees, birds, and human figures with distinct hands and feet.

It’s 3.5 miles to the remains of an ancient granary are visibly. Get out and look back and up at a 45-degree angle. The front of the granary is washed away, but the floor, ceiling, and walls are clearly visible.

Another 1.0 mile to see an intact granary. Cross the cattle guard, look to your left. Locate the large, lone cedar tree just at the base of the rock cliff. There is a lot of sagebrush in this area, but the tree is alone at the cliff base. Follow the ledge the tree is on to the right, about halfway across the face of the cliff. Locate a light-colored area of rock above that ledge. The granary is there; with light-colored mortar and appears to be perched on the rock face.

Another granery structure is after 1.5 miles. Look straight ahead up the road to the high cliff. There’s a long slit in the rock that looks greenish. Sllightly below this rock and to the right is a hole in some light-colored rock. You’ll need binoculars and the granary can be seen in the crevice.

After another 2.5 miles Rassmussen’s Cave is marked and it’s the location of some really good pictographs.

Another 1.0 mile the road forks – take the right fork. After 0.9 miles on the ridge you’ve just circled is the remains of a Fremont Village. It’s an easy walk up the hill to the west to visit the rocks that outline several pit houses. From there look to the north across the canyon for a long greenish ledge; with binoculars, you can see it is lined with structures.

After another 0.3 miles there’s a rock outcropping to the right, about 10 feet above the road is a famous hunting scene that is the subject of one of the murals in the Price Prehistoric Museum.

Go back to the forks in the main road and turn right. Go 0.5 miles on that road to an alcove of white rock about a third of the way up the hill. To the left are both petroglyphs and pictographs. The pictographs use colors applied to the rock instead of carving.

Go 1.8 more miles to another petroglyph panel showing men, women, a turkey, a scorpion, a bird and abstract sketches.

The canyon and surrounding landscape literally has thousands of petroglyphs to discover along with several good hiking trails.At times BLM offers guided tours into the canyon. Check with there website.