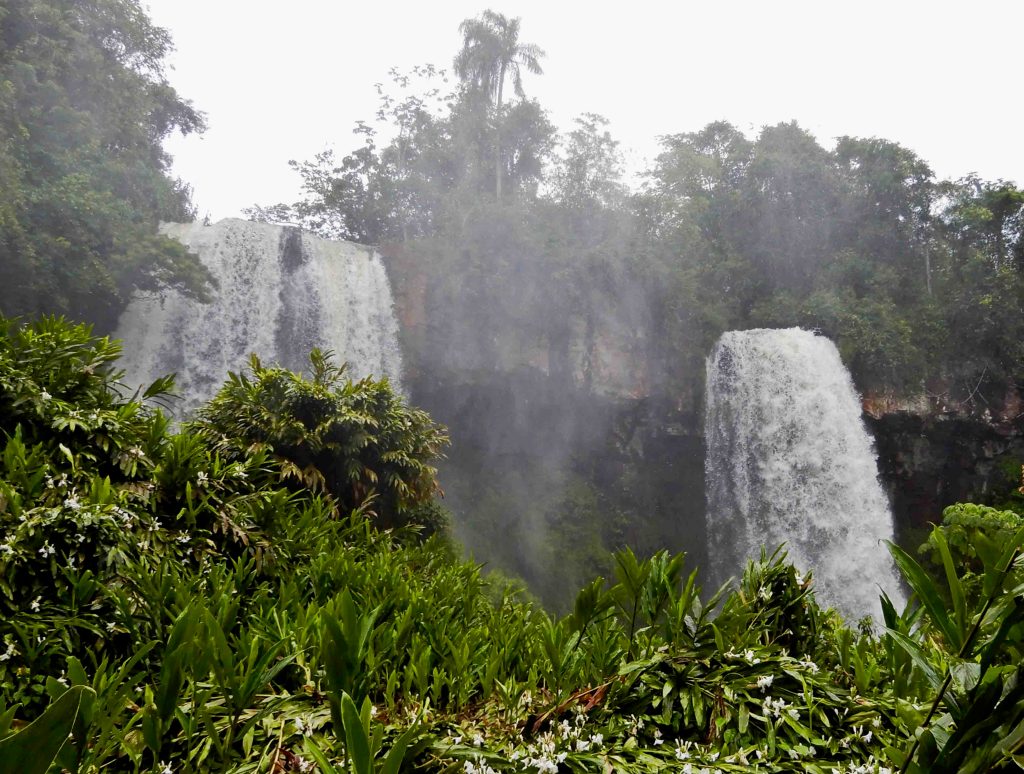
It is the most popular fish on American menus and one of the most farmed fish in the world next to tilapia. Everyone’s familiar with the scenes of salmon running up streams and jumping waterfalls to return to the place they hatched in order to spawn. Though it varies among the five species of Pacific salmon, its life cycle, in its simplest form, is hatch, migrate, return, spawn, die.
Every year throughout the Summer these five species of salmon fill the rivers and streams of Alaska, returning to spawn and die. To take advantage of this abundance, fishing fleets have set to sea and nets have been set in rivers all over the world to catch these returning salmon. The biggest problem with these is that many fish are caught before they can spawn. Congress originally funded salmon hatcheries in the 1950’s in an effort to overcome the added problem created by hydro-electric dams preventing the salmon from returning upstream.
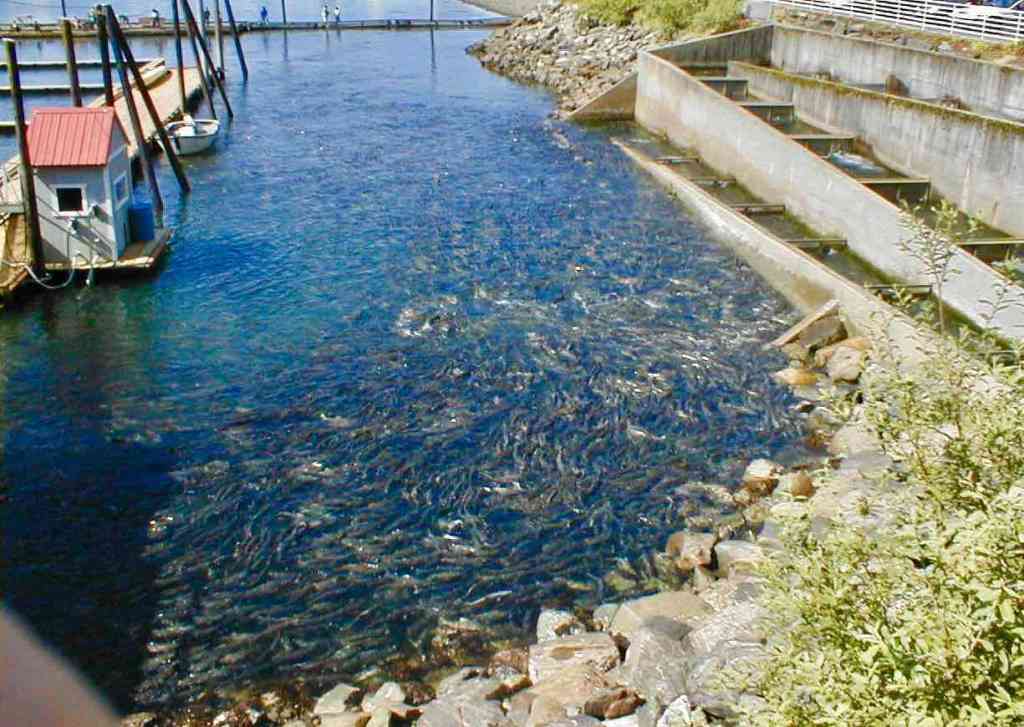
Macaulay Salmon Hatchery
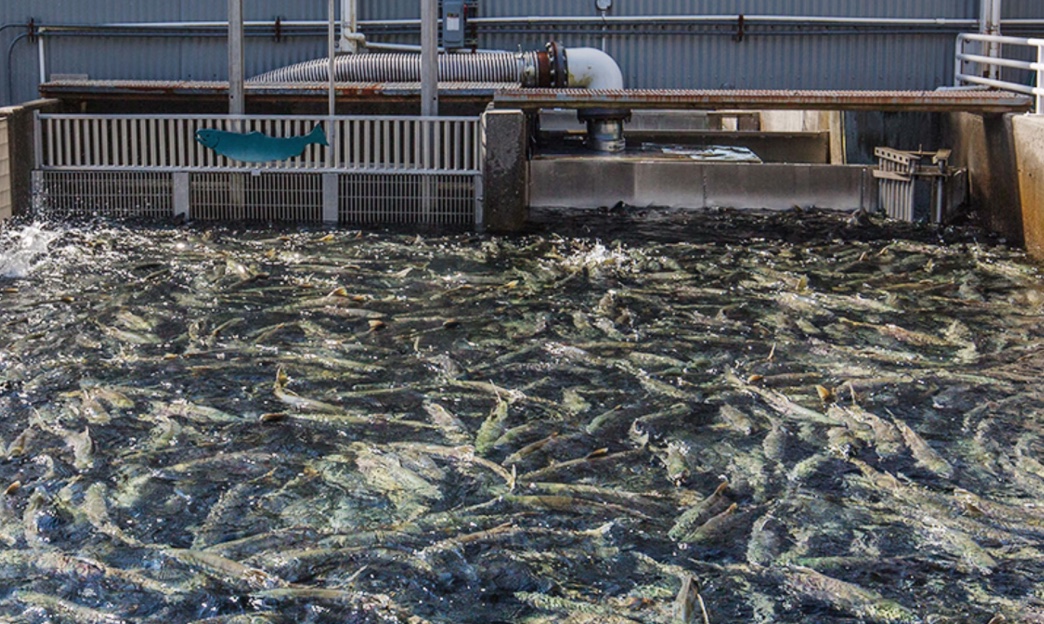
These fish hatcheries were designed to capture and fertilize salmon eggs, raise the fry, release them from the hatchery to migrate where they will eventually return to start the cycle again. A system that is much more efficient than fish farming.
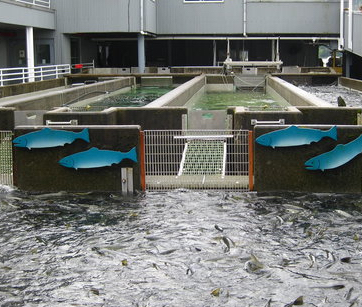
Today in Juneau, the Macaulay Salmon Hatchery collects, incubates, rears, and releases three species of Pacific salmon – chum, Chinook, and coho. At the Macaulay Hatchery, around one hundred thousand visitors a year watch an unforgettable and easily accessible miracle – the entire life cycle of salmon which includes five to ten million fish returning here to spawn.
In 2021 the Macaulay Salmon Hatchery reported that they released 135,000,000 Chum salmon, 1,250,000 Chinook salmon, 1,500,000 Coho salmon and 50,000 Rainbow trout into the wild.
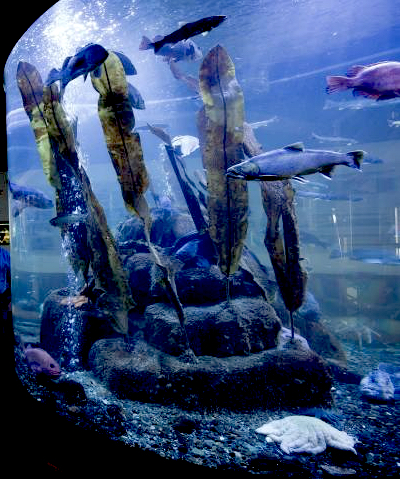
The Visitor Center offers a unique number of attractions. In May through September, they’re open every day a cruise ship is in port. Spend time in the outdoor hatchery while a local guide shares with you the life cycle of Pacific salmon and the workings of this amazing hatchery. Inside, view salt water aquariums displaying over 150 species of marine life, including touch-tank aquariums. A truly remarkable experience for the whole family!
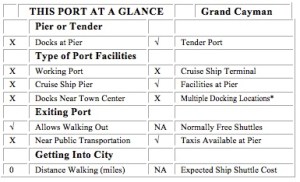
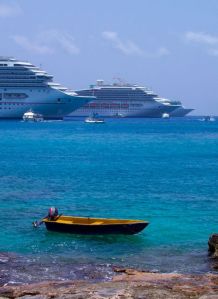
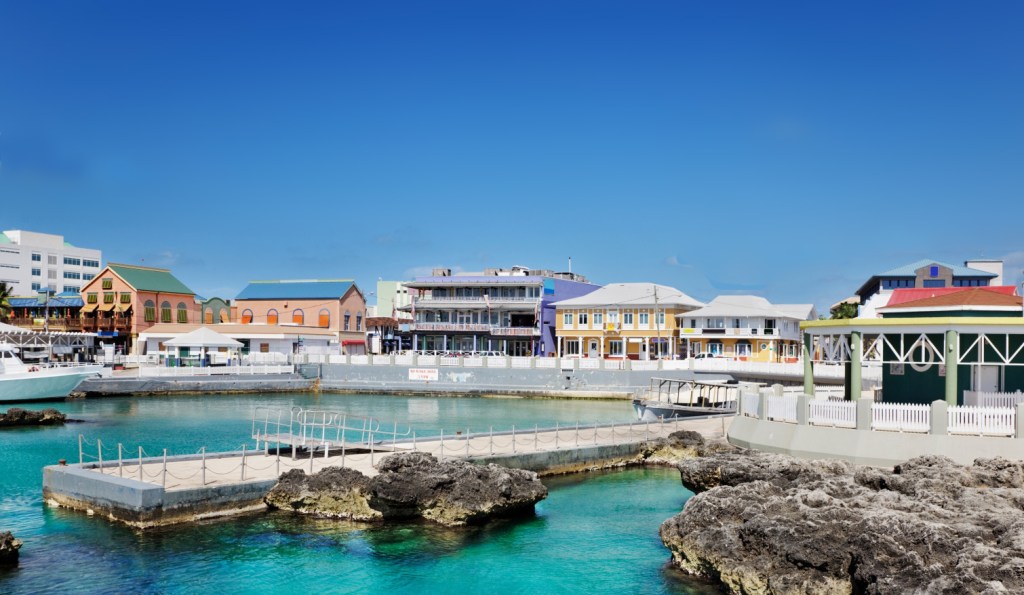
General – George Town, Grand Cayman is a major cruise destination for Western Caribbean cruises. It is a modern town famous for good duty free shopping and offering a number of good tour itineraries. The port requires tendering but the tender pier is right in the heart of town.
George Town with tender dock on the left
The biggest attractions in Grand Cayman are focused on the beaches and the clear turquoise water. The island is a major destination for sport divers and
Transportation – There are basically three ways to get around this island:
Bus System – Cayman actually has a pretty efficient bus system with fares starting at CI$2.50 (US$3.15). The central bus terminal is located in downtown George Town.
Taxis – Taxis are readily available but like most things in Cayman can be pricey.
Rental Cars – Cars are pretty easy to arrange but can be a bit expensive. Finding your way around is pretty easy, traffic is moderate but remember they drive on the left.
Money – The local currency is CI$ and is fixed at an exchange of US$1.25 to CI$1.00, so remember that everything is 20% more expensive than it seems. The US Dollar is usually welcome along with most credit cards with ATMs readily available.
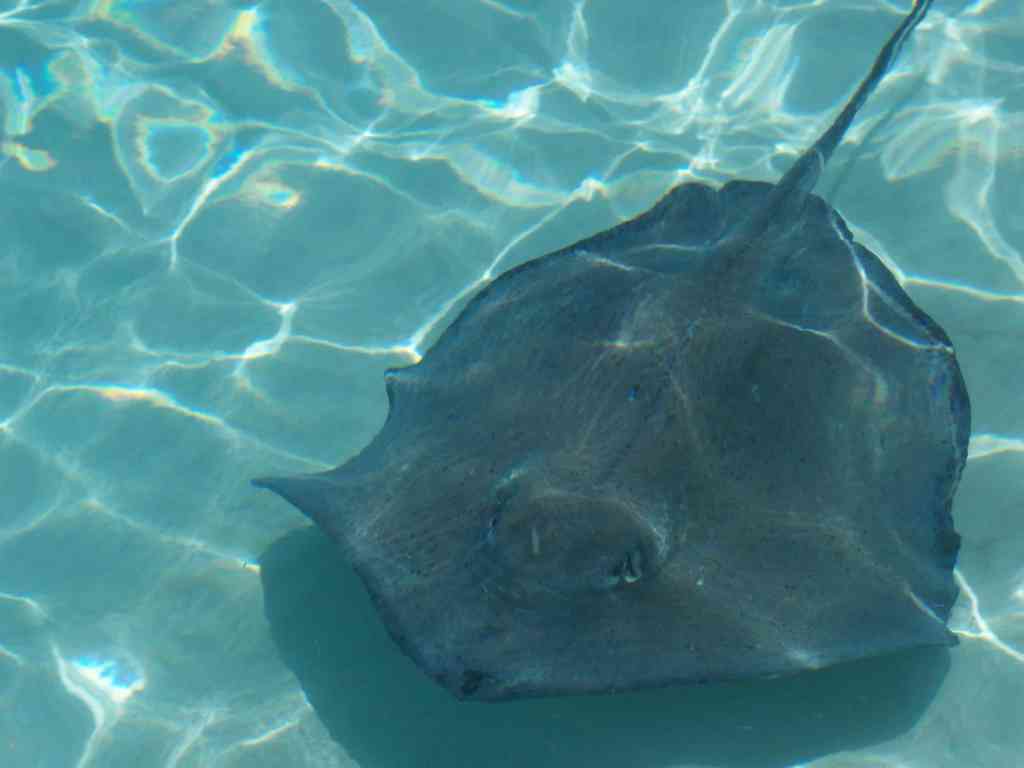
Sting Ray City
Local Attractions – Beaches, beaches, beaches with the centerpiece being Seven Mile Beach with its resort hotels and restaurants. The island is also a scuba and snorkeling paradise with lots of coral reefs in shallow water for great snorkeling along with a great drop-off wall for scuba diving. Grand Cayman was the originator of the stingray tour called Sting Ray City where you can actually walk on a shallow sandbar and hand feed the stingrays.
George Town
Other attractions include swim with the dolphins at Dolphin Discovery, The Cayman Turtle Center, Crystal Caves and visiting Hell a gift shop with famous post office where you can send home cards postmarked HELL.
The tender docking area
Grand Cayman is also famous for its duty free shopping with excellent buys from diamonds to watches to luxury housewares and fashion accessories. It is also home to one of the Caribbeans best rum cakes.
We arrived in Bucharest Tuesday morning and did a quick trip around the city with a local guide. The first thing we learned is that currently there are over two million refugees from the Ukraine now in Romania, mostly women and their young children. As we drove around the city we saw several city parks with groups of mostly young women with children. We learned that most of them are Ukrainians who gather in the parks to network and feel connected to their community.
Romania is a country with less than twenty million residents that have mostly welcomed over two million Ukrainian refugees into their country. Most of these have been taken in to live with Romanian families. During the day the Ukrainian women gather in parks to be with other Ukrainians.While there are a few government programs that offer assistance to local families who take in Ukrainians, it is very little. The average income per Romanian worker is about the equivalent of US$1,000 per month. Right now the cost of living in Romania is very low which helps a lot. Beef costs about US$3 per pound and chicken about US$1.75 but the major issue currently involves gasoline that today sells for between 6 and 8 US Dollars per gallon.
Today I’m not so sure that Americans would be as generous but the United States has no collective experience of having to live under totalitarian Communism as did much of Eastern Europe.
Tuesday we took a drive south of Bucharest and were shown a new consequence of the war in Ukraini. Forty minutes outside of Bucharest we came upon long lines of semi-trucks lined up along the roads heading east. At the same time we also hundreds, if not thousands of semi trucks heading west. We were told that the lines of trucks were spending days lined up to get through Moldova and Southeast Romania into the Ukraine, mostly to pick up wheat and move it west to markets.
Russia has blocked access to the Black Sea and even though they claim to be opening routes to allow the export of wheat there doesn’t appear to be any reality to their claims. We’ve been informed that even if that were so trucks can nowhere move as much grain as is required.
One of the most popular cruise destinations on Mediterranean cruises has been Venice, Italy. For years there have been groups and organizations protesting what many claim could be serious damage to the buildings and canals of the water city caused by the large cruise ships. This has been countered by other groups that believe that the city receives substantial revenues from the cruise lines for dockage fees. Even after the results of two major studies found that the damage caused by frequent storms is a much more serious threat than cruise ships the United Nations and its World Heritage arm still threw their weight against the cruise ships. Unfortunately the controversy surrounding the docking of large cruise ships in Venice has now been settled – Cruise ships above certain sizes (about 90% of them) are now banned from entering Venice.
In response the cruise lines are setting up alternate ports that will still allow their passengers access to spend time in Venice and also provide other ports to replace Venice as a departure port. The two nearest ports with adequate docking potential are Ravenna and Trieste and for the time being the cruise lines seem to be selecting between the two. For example Royal Caribbean and Celebrity are focusing on Ravenna while NCL will be using Trieste.
Saint Mark’s Basilica
As you explore itineraries you’ll find a number of ships are staying overnight to allow plenty of time to visit Venice. Using buses Trieste is about a little over two hours to Venice (135 miles) with the Ravenna trip coming in between one and half to under two hours (105 miles). Another option that is also gaining traction is taking advantage of overnight hotel accommodations in Venice during your port stay.
If you are inclined to visit Venice on your own there are a number of affordable options to explore with bus service still topping the list:
Trieste to Venice
FlixBus operates a bus from Trieste to Venice that leaves every 4 hours. Tickets cost $12 to $15 (€10 – €13) and takes about 2 hours. Itabus also has service 5 times a day. By rail Trenitalia operates a train from Trieste Centrale to Venezia S. Lucia every hour. Tickets cost $12 to $24 (€10 – €21) depending on seat class and the trains take 2 hours and 5 minutes.
Ravenna to Venice
The best way to go to Venice from Ravenna is by bus, which costs about $10 (€9). The train to Venice, costs about $17 (€15) with trains about every hour. By bus or train the trip takes about 2 hours and 45 minutes to 3 hours with the bus being slightly faster but with less frequent service than the trains.
Spend some time getting to know your cellphone’s photo app functions.
Use The Photo App Options
Most phone apps when opened start out in “photo auto” mode but there are additional options. They usually include features like “portrait” or “people” mode, “backlight” and “night scene” as a minimum. Each mode has a set of program features designed specifically to improve those sort of pictures. Beyond those there are usually a number of additional features you can explore.
Switching To Manual Mode
Your photo app probably has a feature called white balance which most of the time can be very useful. It is designed to detect an overall color cast in each scene and correct it to a neutral cast. There are shooting moments when this will actually change the character of the scene that attracted you to take the photograph in the moment. There’s a good likelihood that white balance will ruin that sunset photo. Because your phone is trying to balance out all the colors in order for it to look natural based on its program, sometimes it works against you. Many apps allow you to to turn off white balance or change the white balance setting to cloudy. The cloudy setting generally gives you a higher contrast and brighter color. Play around with your phones white balance settings to get more comfortable overriding those settings.
Enable The Grid Lines
Activating grid lines is an easy way to give you more guidance while taking a picture. It helps remind you about the rule-of-thirds (see more HERE). It’s also an excellent guide to let you see those perspective distortions in the scene and will guide you in changing the angle of the phone and that effect.
Get in the habit of using the grid lines on your phones screen to play around with the images composition.
Adjusting Exposure Most phones usually have a tendency to overexpose photos so play around with what overall light and dark options you have. Also while you are viewing the screen of you phone you can tap locations in the scene to tell the phone where you want the focus to be and to adjust for nominal exposure at that spot.
Reducing overall exposure is usually preferred to over-exposure. After treatment of your photo will usually allow you to lighten up dark areas but over exposed areas don’t darken much. Often there isn’t enough detail in over-exposed areas to be recovered because it’s too washed out.
Avoid Digital Zooming
Beyond the information in the image provided by the phones lens there isn’t any additional information that can be captured. Often simply enlarging the image after the picture is captured will produce the same result, and at times better results, than the phones digital zoom. There is also the issue with holding the phone steady when zoomed to avoid excess motion blur. That is a direct issue with high magnification that actually magnifies slight motion in the phone.
If your phone has an optical telephoto lens that allows you to zoom in without losing quality, your only concern is vibration and hand shake causing blur.
Macro Mode
Not all phone camera apps have a macro mode. Usually designated by a flower. Not only does this allow you to get really close to objects it also offers an opportunity to create some dramatic out-of-focus backgrounds. If you haven’t given this much thought give it a try and see what you can create. There’s no real cost in taking lots of digital images so spend some time playing around with your phone.
Also, if you don’t have a macro mode or a telephoto lens there are remarkably inexpensive attachment lenses you can buy that will greatly expand the photographic potential of your cellphone. CLICK HERE FOR EXAMPLES. Most kits spring clip the lenses to your phone and include macro lens, wide angle, fish eye and some have a telephoto lens.
Clean your lens
This may seem like a silly notion but often the biggest item reducing the quality of your pictures is that fingerprint or speck of dust on your cellphone lens. Take a moment to think about your past camera lenses and their size. Chances are they were over an inch in width (sometimes more than two inches). Now look at that lens on your cellphone – a quarter of an inch or less. The smaller the lens the bigger impact that dust has on the image. Keep your lens clean – big difference! Be sure and use lens cleaning wipes or alcohol and a soft, lintless cloth.
Changing Your Perspective
When we move around the world we don’t usually see it as a series of still visual frames. Our minds are always processing the environment and focusing our attention on areas we find interesting. What we are left with are experiences and not still pictures. It is that experience that often leaves us disappointed in the photographs we take. They often do a poor job of demonstrating what we saw and why we were fascinated by visuals of the moment. Understanding this is actually a big step toward taking better photographs. We need to stop being in the moment and start forcing ourselves to see the two dimensional screen and ask if it is saying anything about what attracted us to take the picture in the first place.
Upping your iPhone game
Don’t just accept the photo app that comes with your cellphone. There are a number of free or inexpensive apps that can actually help take your photography to the next level.
Controlling focus and exposure separately. The problem with accomplishing that trick is that the iPhone sets both exposure and focus with a single tap. If you tap on your foreground subject and it’s dark, you can end up over-exposing the photo. The easiest way to solve that problem, is to install a better camera app and there are a number available – these include Camera+ ($2) and Top Camera ($3). Using either of these apps, you can tap separately to focus and specify where to set the exposure. The end result: You no longer have to live with under- or over-exposed photos just because you chose to set a specific focus point.
There are also other apps that allow you to change an image after it’s taken. There’s FocusTwist that shoots a short video and then shows you a still photo derived from the length of video. There’s also AfterFocus ($1). Open a photo or take a one, and then outline the areas that you want to be in sharp focus. The app then blurs everything else for you, giving you a convincing shot with simulated depth of field.
Lock the focus without using an app on you iPhone. Instead of a tap to set only exposure you can lock the focus on the iPhone with a tap and hold on any spot on the screen for a few seconds when you see a yellow box flash around your finger. Remove your finger and you’ll see the message “AE/AF Lock” on the screen. Until you take the photo, the focus and exposure will remain the same till you tap the shutter release.
Apps for Androidusers.
Open Camera is a compact camera app for Android cellphones and tablets. It is free with no in-app ads. This Android app has different focus modes, scene modes, auto-stabilizer, HD video recording, handy remote controls, configurable volume keys, geotagging of photos and videos, support for an external microphone, HDR, dynamic range optimization mode, small file size, etc. and it’s open-source..
Google Camera comes installed on all Pixel devices but the Android community, has managed to make Google Camera app available on other Android devices. Making things like Pixel portrait mode, HDR+, and more plus the Pixel 4 camera’s Astrophotography feature, which enables users to capture great shots in the dark. GCAM apps are ported by third-party developers, so you may find lags and bugs in the download.
Adobe Photoshop Camera is good for taking a lot of selfies as the app comes with a ton of camera filters and effects. The filters can be applied before or after you shoot the picture, and some are remarkable and the app has intelligent AI that recognizes the subject in the picture and applies filters with real precision. It also has post-editing tools that change brightness, contrast, saturation and a magic wand tool that can remove sharp shadows and deep black areas. Unfortunately it does not allow for manual selection of shutter speed, exposure, focus, and is supported only on a few Android devices.
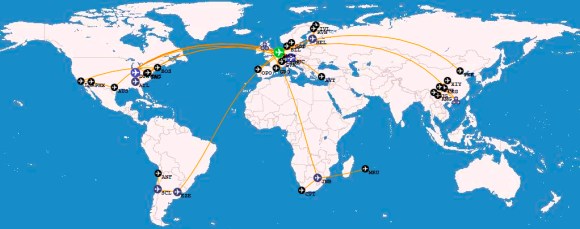
In the last dozen or two years we have made a number of international trips. There have been times when we hardly experienced jet lag at all, but a few trips took days to recover. Our experience has taught us a few things including what causes the worst jet lag. It seems that traveling east causes more problems with jet lag than traveling west. We also believe that what time the flight starts can have a big impact on how serious jet lag will be. Generally late evening flights are the better than morning flights especially on long trips. Our biggest issue is usually insomnia with the worst being a Singapore to Florida trip that literally took a four days to readjust from.
The most serious issue is flying across time zones where your body times evening becomes the destinations morning (or other way round). In addition to insomnia there is often gastrointestinal issues, and you can experience difficulty concentrating.
Instead of just letting it happen you can reduce jet lag by preparing for your flight and making sure during your flight you get as much sleep as possible. After the flight spend as much time as you can out in the sunshine to quickly adjust to the local time.
Here’s what the experts suggest:
Before Your Flight
Adjust Your Schedule
A few days before the trip adjust sleeping and eating schedule. Depending on the trip start a couple of days to up to a week before the flight. Traveling east, go to bed between one and two hours earlier each night. Traveling west, go to bed one or two hours later in the days before the flight. This gives your body a chance to adjust to new time zones ahead of time.
The same applies to your eating a few days before your flight. Change meal times closer to when people eat at the destination so your body gets used to the new meal times. If dinner time is several hours behind in your destination, have your dinner an hour or two earlier than usual.
Stay Hydrated
To reduce stress on your system avoid coffee and alcohol a day before your flight. Studies have shown that drinking coffee and alcohol before you fly can make your jet lag worse. Try to stay away from coffee and alcohol before you are set to fly. Stay hydrated by drinking lots of water leading up to your flight.
Carry a water bottle and fill it in the departure area. You can also have the bottle filled on the plane so you can stay hydrated while in the air.
Book Flights At The Right Times
Whenever possible book an overnight flight. This allows you to have dinner at a normal time in the evening making it easier to sleep on the flight during the night. Depending on your destination, you then arrive in the morning after an overnight flight having gotten some sleep. This makes adjusting to the new time zone once you land much easier. Try to avoid long flights where you land in the evening as these can aggravate jet lag.
Change your watch to the timezone of your destination when you board your flight. If you wear a watch, change the time so it matches the timezone of your destination. You can also adjust the clock on your cellphone. Doing this will help you get accustomed to the new timezone and ready for a new sleeping and eating schedule.
Get Rest During Your Flight
Airlines seem to want to distract passengers during a flight and often provide food, snacks and drinks and often show movies in flight. Even if it’s a movie you wanted to see, is it worth suffering serious jet lag for a day or two afterwords? Travel with a pillow and eye mask. It’s really important that you get some sleep on the plane. You could also pack headphones or earplugs to block out noise or distractions on the flight.
Taking Sleeping Pills
Only take sleeping pills during the flight if you are used to using them. If you are not used to them or taking too many can make you feel groggy when you land, and could end up making your jet lag even worse. Discuss this with your doctor before taking a sleeping pill during your flight.
Try and Get Some Exercise
Get out of your seat some and walk in the aisle of the plane, especially during a long flight. Doing light exercise and moving your body can help improve your blood circulation on the flight. It can also help you get to sleep more easily.
Avoiding Jet Lag Once You Land
Get Outside Once You Reach Your Destination*
It’s important to get some exposure to natural sunlight. Light exposure regulates your body’s circadian rhythm and helps you adjust to your new location. If you traveled westward, go outside in the evening so your system realizes it’s late. If you traveled eastward, in the morning get exposed to sunlight early in the day.
*Avoid going outside if you’ve traveled more than eight time zones. If you’ve traveled more than eight time zones to the east, wear sunglasses and stay away from bright light in the morning. Then, try to get as much sunlight as possible in the afternoon.
If you traveled more than eight time zones to the west, avoid outdoor light a few hours before dark for the first few days so you system can adjust to the local time.
Eat At The Local Time
Once at your destination, try to have meals at the local time so your system can adjust. If you land at night, for example, have dinner at the local time. If you land in the morning, have breakfast at the local time.
If you find yourself getting hungry between meals times, have snacks to keep you satisfied. Only have large meals at the local time so you can adjust better to the new time. Keep hydrated. Make sure you have a lot of water with your meals. Dehydration can make your jet lag much worse.
Adjust Your Sleep Schedule.
You should sleep based on the local time and stick to a “normal” sleep schedule. This will make your jet lag less intense and help your body better adjust to the new time zone. If you land in the early evening, stay awake until the late evening so you can go to sleep at the new appropriate time. If you get in early in the day, stay awake until the evening so again your sleep time matches the local time.
Take Melatonin To Help You Sleep
If you struggle with going to sleep in the new time zone, consider taking melatonin. Melatonin is a nonprescription drug that has been shown to help set your internal clock and make going to sleep much easier. Having 3 milligrams of melatonin before bed for several days after arrival can help regulate your sleep schedule. Again talk to your doctor about taking melatonin before you go on your trip.